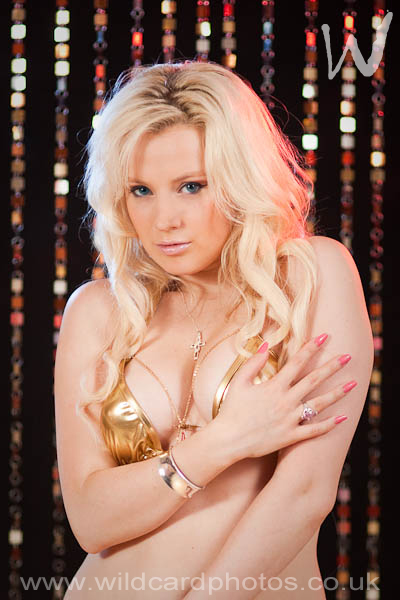
Behind The Scenes - Syren Sexton’s DIY Nightclub (or Everything But the Kitchen Sink) |
|
|
This post is so named because I used just about every technique, light and prop that I had at my disposal at the time to create this image of superb glamour model Syren Sexton. Even better, in typical Matty fashion, I did it on the cheap! To break it down, lets look at the idea first. I wanted to create an image that was quite sparkly and with many coloured lights with a bit of a nightclub feel to it. I sourced the model and found that she had the perfect gold bikini / clubwear outfit. I knew the background would be predominantly black as in the nightclub, so knew I would use my background support with my black cloth fitted to it. I wanted something more in the background though and specifically wanted something to shine coloured lights through and to reflect off of. Amazingly I found the answer in a metallic fly screen! But then how to suspend this behind the model but in front of the black background to enable space for lighting? The answer was a bit of DIY. I didn’t have another background support (which would have been the ideal method) but I did have two spare light stands with spigots on the top. I went to the DIY store and bought a length of waste pipe. I drilled a hole near each end through one side only (ie not all the way through the tube) so it would site onto my light stands. I then cable tied the fly screen to the pipe. Perfect! For lighting, at the time of the shoot, I only had two studio lights so these were used as key and fill via umbrellas. But I knew I wanted coloured hair lights on the model that would also shine through the fly screen and hopefully bounce around a bit. I used two cheap Chinese flash guns super-clamped to my background support and fitted one with a blue gel and one with a red gel. I triggered these via radio triggers and had the studio lights slaved off them. The final piece of the jigsaw was in blurring this background slightly. I had so much light bouncing around (even with the studio lights on minimum) that I couldn’t open the aperture wide enough to get the shallow depth of field I wanted, so I had to find a way of cutting the amount of light entering the lens. The easy answer was a neutral density filter. Bingo. This image goes to show that with proper planning and thinking through all aspects of the shot you can achieve big studio results with very little equipment and expense. I’m sure my model wondered what on earth I was doing as the set must have looked more like a branch of B&Q than a photo studio, but hopefully she is as pleased as me with the result. It doesn’t matter what is outside of the field of view of the camera, just as long the image you take is what you wanted to achieve. |
|
|
|
|
If you would like images like these taking for you please contact us. To learn more on how to get the best from your cameras, lenses and accessories come on one of our photography courses. |
|
More Articles |
All images and content on this website are copyright and the property of Dennis and Matthew Smith (Wildcard Photography). Downloading, copying, distribution, printing, publishing or any other use in either paper or electronic form is prohibited without prior permission from Wildcard Photography. Purchase of a print or photo-gift does not grant copyright privileges or ownership of the image. Should you wish to use our images in any way, you should contact us to agree terms, which will be based upon the type of use and level of exclusivity required.


