Behind The Scenes - Underworld Shoot |
|
|
I recently carried out one of my most ambitious shoots to date, involving a number of factors that required more than a little planning. Here is the behind-the-scenes story followed by a selection of the resulting images…. Ever since I first did a shoot with Carissa some three years ago she has been nagging me to do a vampire themed shoot. I didn’t really need much arm-twisting for this however as a) I had always wanted to do that theme and b) Carissa is such a joy to shoot with that it is almost impossible to take a bad picture of her. But with our busy schedules it has taken us this long to get it sorted. The original idea, and one we might revisit at some point, was a period themed vampire shoot – think Dracula’s brides. However, being a fan of (some of) the Underworld movies (I say ‘some’ because they are a bit variable in quality!) and with Carissa bearing more than a passing resemblance to the heroine we thought this would be a great idea to use as inspiration. I wanted to do something more movie-like in feel that looked like a big production even if it was, like most of my shoots, done on the cheap. To recreate this theme a number of key points would be required:
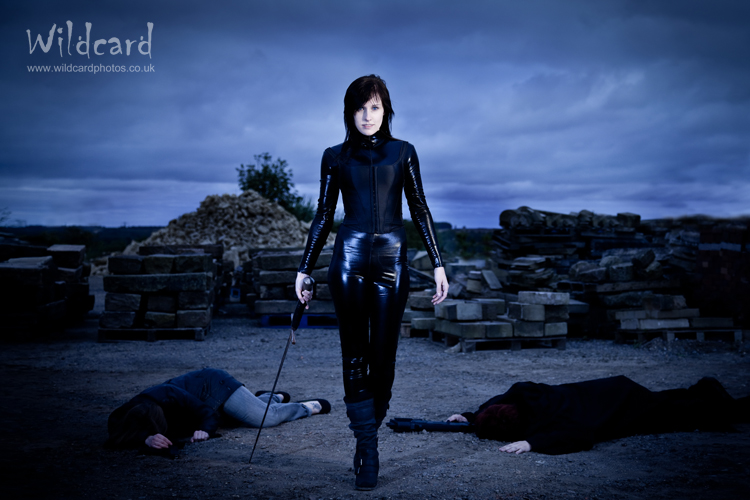
As this was a portfolio shoot we each brought something to the party. Carissa had had the teeth specially made for her (by the same guy who made various special effect teeth for the Harry Potter movies) when we first started talking about a vampire shoot. The Underworld vampires have unnaturally blue eyes and we toyed with the idea of using contact lenses, which are now available relatively cheaply in various weird and wacky styles. Carissa wasn’t too keen on that though and I figured that I could very easily colour her eyes in Photoshop so that’s what we did. Carissa sourced a suitable skintight PVC catsuit and accessorised it with a bodice, etc., to replicate the outfit seen in the films. To add a bit of atmosphere to some of the shots I bought some ‘smoke in a can’, which is a much cheaper alternative to a fully blown smoke machine and there is no waiting or power requirements or consumables to worry about. Carissa’s friend Ste has a replica weapons license so he was invited along with his arsenal. Location was a big problem. With realistic weapons around we needed somewhere private enough to avoid any visits from the local Constabulary. But it also had to provide suitable backgrounds. I was looking for an industrial feel to the images and after trying to arrange permission at a number of places we ended up at a builder’s yard in the middle of nowhere. It was ideal having lots of materials to clamber on and also a number of steel storage containers. To understand suitable poses, Carissa and I did some research into imagery from the films and printed some photos off the internet for reference. In the heat of battle on a shoot I often forget what I had planned to do so I find it useful to produce storyboards of the images I want to capture. These took the form of about a dozen sketches – very crudely drawn much to the amusement of the cast and crew – but with just enough detail to jog my memory as to what I was intending to do with each shot. Inevitably, the location and other members of the team also suggested further shots on the day so you have to be flexible. The storyboard of shots dictated that we would need additional people to be involved as a number of shots required extras to play the parts of foes and victims. We would also need at least one assistant to help with rigging lighting and act as VAL’s (voice activated lightstands) when necessary. Wildcard Dude #1 was happy to assist and also took some behind the scenes shots (see later). Ste and his girlfriend Lynette were happy to be extras and help out where necessary. So we had our team. Last but by no means least was to determine how I was going to light these shots to create the look I wanted. I had determined from the research that I wanted to darken the ambient lighting to give a dusky feel to the images (after all vampires don’t like the sun, right?) Ideally we would have shot at that time of day but we were restricted to when we could shoot so I needed to achieve this effect in camera. To reduce the amount of ambient light entering the camera you either use a smaller aperture or a faster shutter speed. Changing the aperture would not give me the shallow depth of field effect I wanted for a number of the shots and would also affect the flash, which would be needed to ensure the subject was properly lit at a level brighter than the ambient. So using a smaller aperture was not possible. The solution would have to be to use a faster shutter speed. With the wide apertures I wanted to use to achieve a shallow depth of field that meant using shutter speeds faster than the sync speed for my camera (1/200s). So we were firmly in High Speed Sync territory, which allows you to do this. HSS is great but it brings its own problems. I knew I wanted to use a number of off-camera flashes for creative lighting but HSS only works via the Canon TTL triggering method. This meant using an ST-E2 infra-red transmitter which requires line of sight between the master and slave flashes. This proved a major issue during the session when taking ‘portrait’ orientation shots as turning the camera on its side would hide the trigger from any flashes on the opposite side. I sometimes had to shoot ‘landscape’ just to ensure that all the flashes would fire and then later crop to ‘portrait’ in software. The other problem with High Speed Sync is the loss of flash power. When trying to overpower the ambient this really is a problem and the whole session was a big balancing act trying to eek out as much power from the flashes as possible. Ideally I could have done with a couple more flashes to double up where needed. I was using gels (more on this later) which sapped power so I couldn’t use any other mods for softer lighting and I had to zoom the flash heads to wring a little more out of them. The gel loses you about a stop of power but zooming the flash just about gets it back. The downside (depending on the shot) is the much tighter beam of light. For most of the shots I used either two or three flashes - usually a main light for our subject and then one or two accent lights. These were typically positioned to rim light the subject otherwise her dark outfit would completely merge with the darkened background. The key aspect of giving the Underworld dusky and movie-like feel to the shots was in providing a very ‘blue’ look to the images. I knew early on that I could achieve this quite easily through one of my favourite flash techniques. This involves using the incorrect white balance and gelling the flashes accordingly. I set the white balance in the camera to tungsten, which has the effect of adding blue to the image. This makes anything neutral (ie daylight) blue so anything lit by the ambient light would take on this blue tinge. Of course I didn’t want my subject to also be blue so I needed to gel the flashes so that they would no longer produce neutral light. Remember that tungsten white balance is intended to correct a tungsten light source back to neutral – so we need to make our flashes appear to be tungsten light sources. We do this by adding a CTO (colour temperature orange) gel over the flash. Hey presto – neutrally lit subject with a blue background! You could do this in Photoshop but it is much more fun to play with light than sit in front of a computer. All of the shots did have post-processing to some extent as you would expect and some involved more than others. Mostly this was for cleaning up messy backgrounds and providing the eye colour but in general all the exposure and colour effects were achieved in-camera. It always gets a great reaction when you show someone a shot on the back of the camera that looks nothing like what they can see in front of them due to your mastery of light and colour. Compare the behind-the-scenes images with the resulting shots to get a feel for this. If you want to learn more about off-camera flash and flash techniques in general please consider attending our Portrait & Lighting Course or book us for a one-to-one tuition session. So having completed the shoot, what did we learn and what would we do differently another time? Well I suppose most of it comes down to budget. Being a personal project this was all done on a shoestring and some of the compromises we had to make could have been made a lot easier had we had a commercial shoot budget. Specifically I struggled with not enough light to overpower the ambient. I could have done with more flashes. Or the cheaper method would have been to work at dusk but the location was not available then and we would have faced a number of safety issues. I also struggled with triggering the flashes using infra-red so a radio TTL system like the new Pocket Wizards or the new Canon flashes would have been useful. I would have liked a better location but we did the best we could with what was available, though it meant a fair bit of Photoshopping. The wind on the day was a mixed blessing. It gave some great movement in the hair but it made the smoke largely ineffectual. As ever, I need to slow down more when shooting. It is very easy to get caught up in the moment and blast away, especially when you have an expectant team waiting on your every command. Using the storyboards helps to put structure into the shoot so that hopefully I don’t forget a shot that I wanted but it is easy to rush setups and forget something along the way or overlook something daft like stray hairs or litter for example. Whilst I would sooner have one great photo than twenty mediocre ones it takes a great deal of discipline to slow down enough to achieve this. Someone once asked me what my best bit of advice was for new photographers – I simply said “slow down”. Despite the compromises this was one of my favourite shoots to date and I intend to do more location shoots like this in the future where hopefully we can try to achieve the look of bigger production values, even if it has to be on a shoestring. Hope you like the pics. |
|
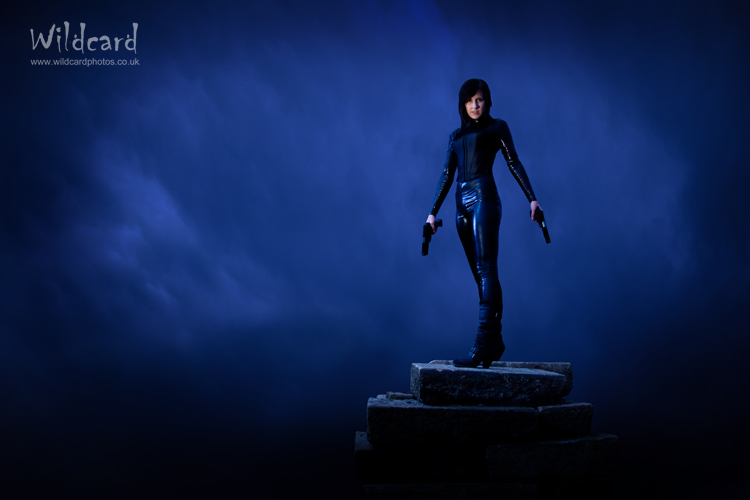
This is the actual sky that was behind the image but I cloned out the foreground and dragged the sky down to cover the bottom half of the image. |
|
|
|
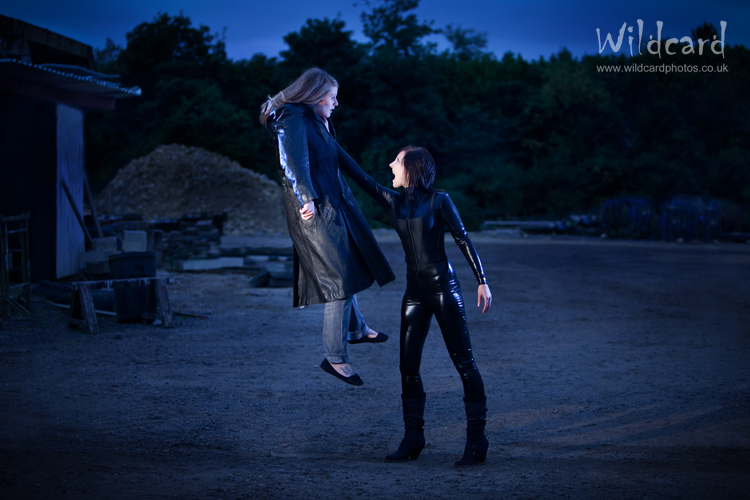
This required a huge amount of photoshop work compared to what I normally do. It was actually a combination of three shots. One with just Carissa holding her arm up in mid-air. One with her victim (Lynette) behind held aloft by Ste and another one of Lynette that had some cool movement in her coat that I pinched for this shot. |
|
|
|
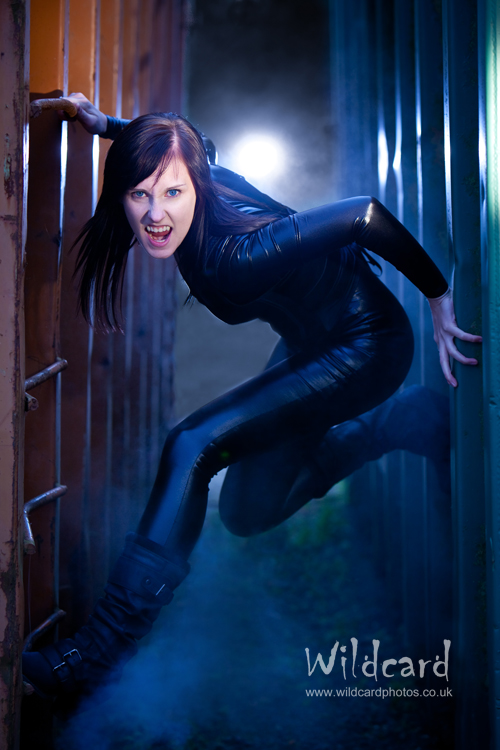
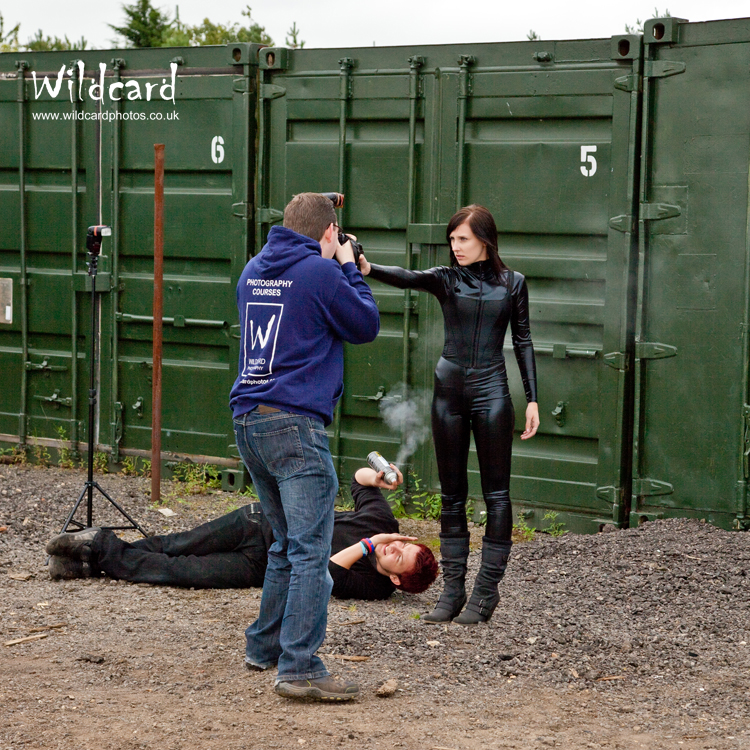
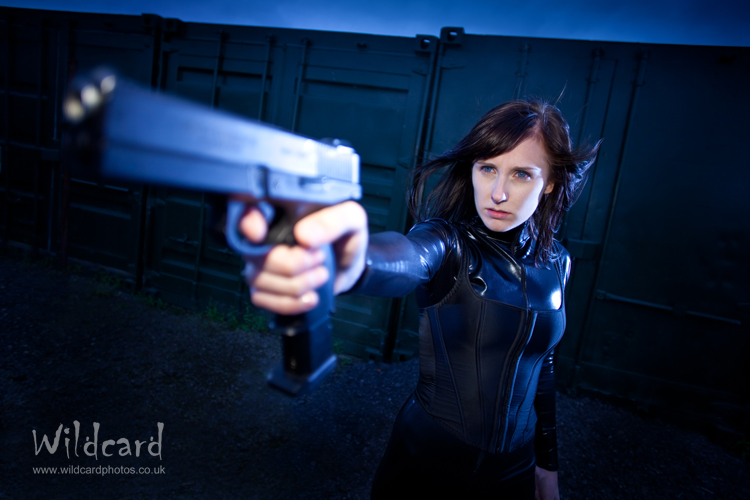
Behind the scenes of the following image. This was shot with a 20mm lens as I wanted the wideangle effect close up. Poor Ste was getting covered with the oil from the smoke canister. Very little was done in Photoshop showing just how much you can do in camera with the correct technique and imagination. |
|
|
|
|
If you would like images like these taking for you please contact us. To learn more on how to get the best from your cameras, lenses and accessories come on one of our photography courses. |
|
More Articles |
All images and content on this website are copyright and the property of Dennis and Matthew Smith (Wildcard Photography). Downloading, copying, distribution, printing, publishing or any other use in either paper or electronic form is prohibited without prior permission from Wildcard Photography. Purchase of a print or photo-gift does not grant copyright privileges or ownership of the image. Should you wish to use our images in any way, you should contact us to agree terms, which will be based upon the type of use and level of exclusivity required.

