
They say ‘the camera never lies’ but even in the days before the likes of Photoshop, people were manipulating images and attempting to trick the viewer, either deliberately as hoaxes or simply to create to something that wasn’t actually there for artistic purposes.
These days we have Photoshop that can create basically anything you can think of in addition to enhancing the practical effects of what was actually captured in-camera.
But even back in ‘the good old days’ cameras were capable of creating images that we simply cannot see with the naked eye. A slow shutter speed will show motion as blur such as car brake lights streaking across the frame or a milky waterfall. A fast shutter speed can freeze motion, bringing out detail that we can’t normally see, for example a hummingbird’s wings.
And then there are optical effects that change our perception of the scene. In a simple way, changing the aperture will create a different depth of field effect to what we experience on the day. A tilt/shift lens can create a miniature look to a scene and a fisheye lens expands our field of view.
All this means that we have a world of opportunities out there for creating images that are different to what we see with our own eyes at the point of capture. And this means that for those images to be successful we need to train our brains to pre-visualise the outcome. This is easier for some than others but I find it useful to almost ignore the scene in front of me and try to picture the finished image.
Firstly, we need to understand what it is that we are wanting to achieve. How do we want this image to look? This is all part of having a clear concept for the image.
Then comes the technical aspects of how to achieve that outcome.
You need to analyse the existing situation. Determine the light levels and what the likely camera settings are going to be to achieve a decent exposure. Then, tweak those to suit your desired outcome. Consider also any special equipment that might be required, such as a particular lens, flash equipment, gels, etc. Spare a thought also for any post-processing that you might need in order to take your raw capture to the finished article.
Here’s a couple from our portfolios:
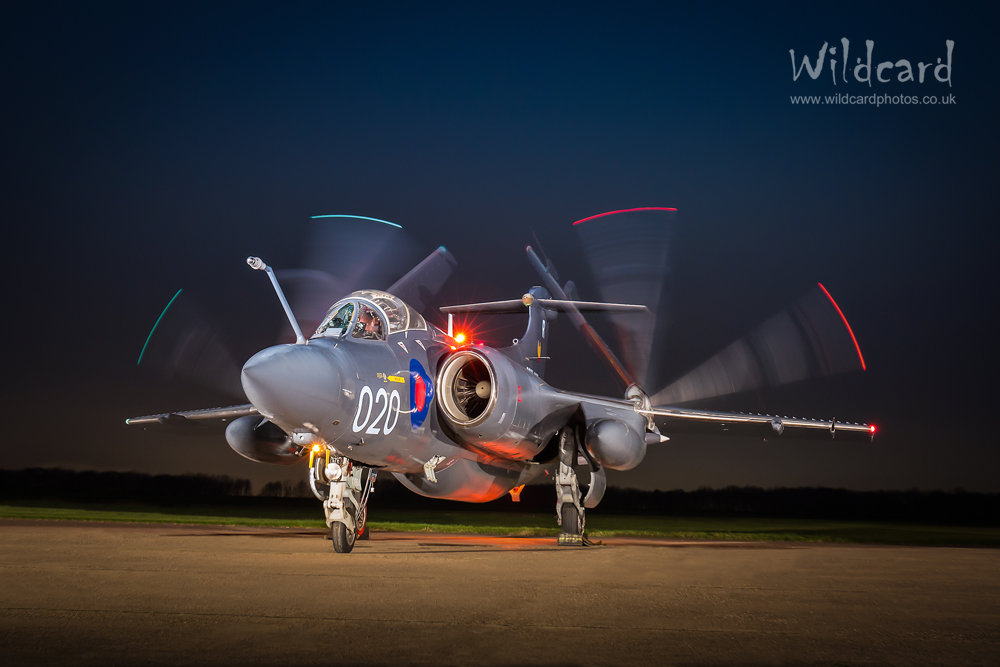
The Buccaneer’s party piece is its ability to fold up its wings for storage on aircraft carriers and the like. I pre-visualised an image showing this movement as blur while the rest of the aircraft was sharp. The easy solution would have been to set the camera on a tripod and use a long enough shutter speed to show the entire movement as one sweep. I wanted to do something a little different so took four shots: one with wings fully down, one with wings fully up and two with the wings doing a partial sweep. I knew that I could combine these four images in Photoshop to give the result you see here, which I think looks a bit more dynamic.
If the last shot didn’t actually require too much of a stretch of the imagination, then this shot certainly did:
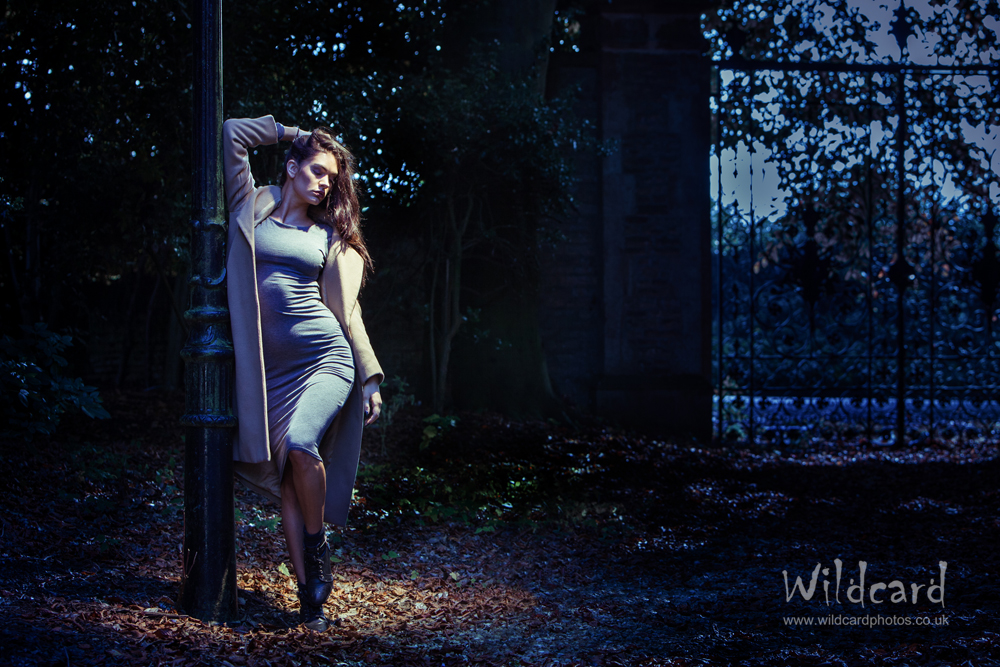
I had seen this lamp post and wrought iron gates at Sedgebrook Hall many times during our courses there and always wanted to do a shoot involving them. So when I had the opportunity to shoot a model there I pre-visualised this night time shot. However, we were shooting in the middle of the day and the lamp post doesn’t actually work! So how did I do it?
Firstly, I under-exposed the background. Easy enough so far. I then wanted to create the blue light for the dusky feel. The solution to this was also the solution to the missing lamp bulb. I set up a flashgun on a high stand positioned between the model and the gates. But where is it? I knew in advance that I would have to clone it out in Photoshop and that was again pretty easy but knowing what you can and can’t achieve in post-processing let’s you understand that limitations of what you can create.
So now we had our light. But how did we make the ambient light blue? I put a Colour Temperature Orange gel on the flash to make it effectively a tungsten light source. Setting the white balance in the camera to tungsten adds blue to the image to correct the flash back to neutral. Thus, we had a model lit by neutral light and the blue added to the ambient daylight made the rest of the scene look like twilight.
Ok, so these examples might be a bit beyond the average snap in terms of the amount of planning, equipment and so on that was required, but the principle still holds. Even with more run-of-the-mill situations it is a good idea to try to pre-visualise the image you are trying to achieve as this will lead you towards the correct settings you need in the camera and hopefully result in you capturing the images you want.
So, the thought process will be: pre-visualise your shot, work out the settings you think you need for it, take a shot, evaluate it against the pre-visualised image, if it didn’t achieve what you wanted change a setting accordingly and try again. I call this the photography feedback loop and it when you are starting out it might take quite a few goes and test shots to narrow down your settings to get what you want but after a while experience kicks in and you tend to get it dialled in more quickly. Of course, happy accidents do occur as well so always be open to serendipity but pre-visualisation and planning your images often gets the best results.
To learn more, please check out our courses, activity days and tuition materials.